Since I started moving to modern miniatures, one of my biggest challenges was the decor. Notably wall decor.
Will admit I relied on the stylings from other modern miniature blogs like Mini Modern where I got introduced (and hooked) to displaying mini Rex Ray paintings and what not. Or lately, I do enjoy randomly using laser cut beads and arranging them to look like installation art.
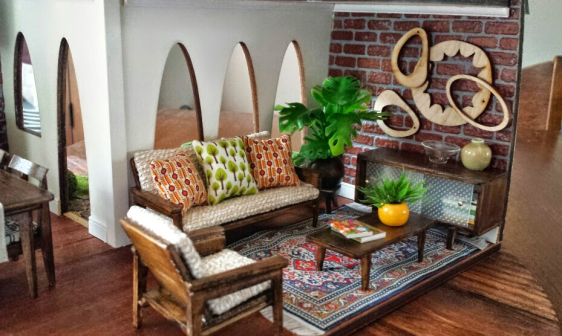
Living room in the ARC III.
Or using my Photoshop/Illustrator/Fireworks to resize existing work. Vintage travel posters are always a reliable standby.

From my Sunday Readings roombox.
But again, I didn’t want to rely too much on these options. Hence my discovery on Artist Trading Cards (ATCs) and ACEOs (Art Cards, Editions and Originals).
I didn’t know much about them – but I remember seeing these cards for the first time at a local art festival where BK and I used to live. I initially thought these cards (they’re about the size of a baseball card, about 2.5 x 3.5 inches) were business cards advertising the artist. Until I saw they had price tags – price tags that imho, were WAY more reasonable than the actual life sized pieces.
Jerry’s Artrama gave a good definition of what ATCs are:
“…Artist trading cards (commonly referred to as ATCs) are miniature pieces of art that are traded around the world. Artists create, trade and collect art at organized “swap” events, either in person or online. The only official rule for ATCs is the size: 2.5″ × 3.5″.
Essentially (if I’m understanding it right), the intention is to give artists another means to trade and collect works from other fellow artists. Which is a pretty darn cool idea. Even cooler for a miniature dork like me? They’re another source of artwork to grace my miniature scenes. Especially if I wanted something big.
So whenever I can get a chance, if I see an ATC card, I usually try to pounce on them and buy copies if I really love the design. One such artist is Poxodd – definitely fell in love with the ATCs for not just how colorful they are, but it had that delicious mix of the weird and fantastic that I couldn’t resist.

My first ATC cards from Poxod. Clockwise from top: Communications Operator, Swamp Dweller, Cactootsy – Poxoddland Band #2, and the Bellmeister – Poxoddland Band #3. Initially purchased from Etsy, but available at shop.poxodd.com.
I had initially planned to use some ATC frames (D’s Miniatures and Collectibles on eBay carries some nice ones that can fit them nicely). But I was worried having something frame them these prints would detract the eye from the card’s overall design. Guess this meant another trip downstairs to my (just recently cleaned) dining room for a quickie project.
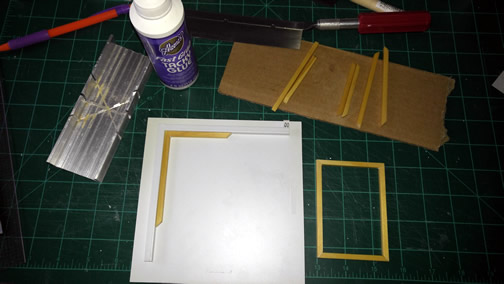
My implements of war for this project…and a sorta assembly process. Just work with me people.
Again, didn’t bother with taking step by step photos because (a) was winging it overall and (b) it happened pretty quick. I prolly banged this out in about 30 mins….way less than it’s taking me to write this blog entry. (“Slow and steady wins the….nope, still plodding along”).
But basically what happened was this:
- I measured out the dimensions of the ATC card – as stated earlier, they’re about 2.5 x 3.5 inches.
- I used some 1/8×1/8 inch wood strips and cut out pieces needed to make a frame that’s the same size as the ATC. To make it faster (since I had 4 cards), I used about 1.5 wood strips to cut out 4 pairs of the long sides for the frame….then when made another 4 pairs for the short sides.
CluelessnessLaziness AirheadnessEfficiency at its best I guess. - Once the pieces were cut, I group them into four sets (each set having 2 long and 2 short ends). One set at a time, I sanded/wiped down before getting some beeswax woodpolish to make them nice and shiny.
- After all the sets were prepped, I used my corner tool (the thing in white) and started assembling them one set a time. I’d glue one long/one short together using Tacky glue, let it set a few minutes, then attach the remaining long/short pieces to form the frame.I used a fast grab type of tacky glue so the pieces would set quickly for me to gently slide them off the tool onto my work mat so I can work on the next set.
- Once the sets were dried enough, I attached an ATC onto a frame using GlueDot strips along the back edge of the card before pressing it onto the card. I ended up putting a pile of heavy books atop the framed art cards to make sure the glue strips had a chance to bond onto the frame…and for the frame to stay nice and flat.
End result? I got my lovely ATCs from Poxodd set to look like they’re artwork on a canvas frame…and I got to a chance to display the back of the cards (to show the artwork’s title and the artist’s name. Win!).

Was pretty happy at how this on the fly project worked out. So much in fact…I actually had extra pieces that made the frames. Ended up bagging them so now I’ll have a template to use the next time I decide to do this for future ATCs/miniature artwork.
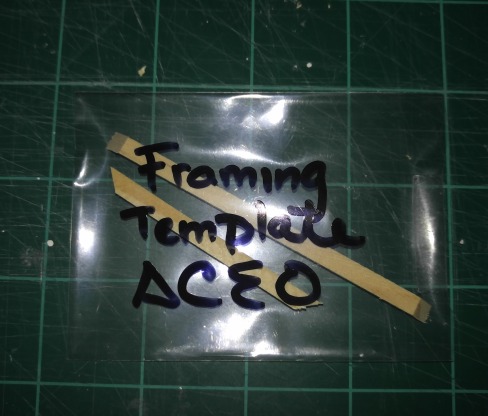
Let’s hope I don’t lose this…I really don’t want to waste my lumber supplies figuring this out all over again.
In the meantime…looks like my new roombox’s new occupants made dibs on a couple of the prints. I’ll think about it. Right now, the place still looks like a disaster zone! (shudder)

Hey! What are you doing??? Put those back – no never mind, they left the cash on the table. My bad!

Well they are legitimate art pieces and deserve to be hung. Really stunning results.
Great idea! I really like the back-mounted style. And those travel posters are too amazing!